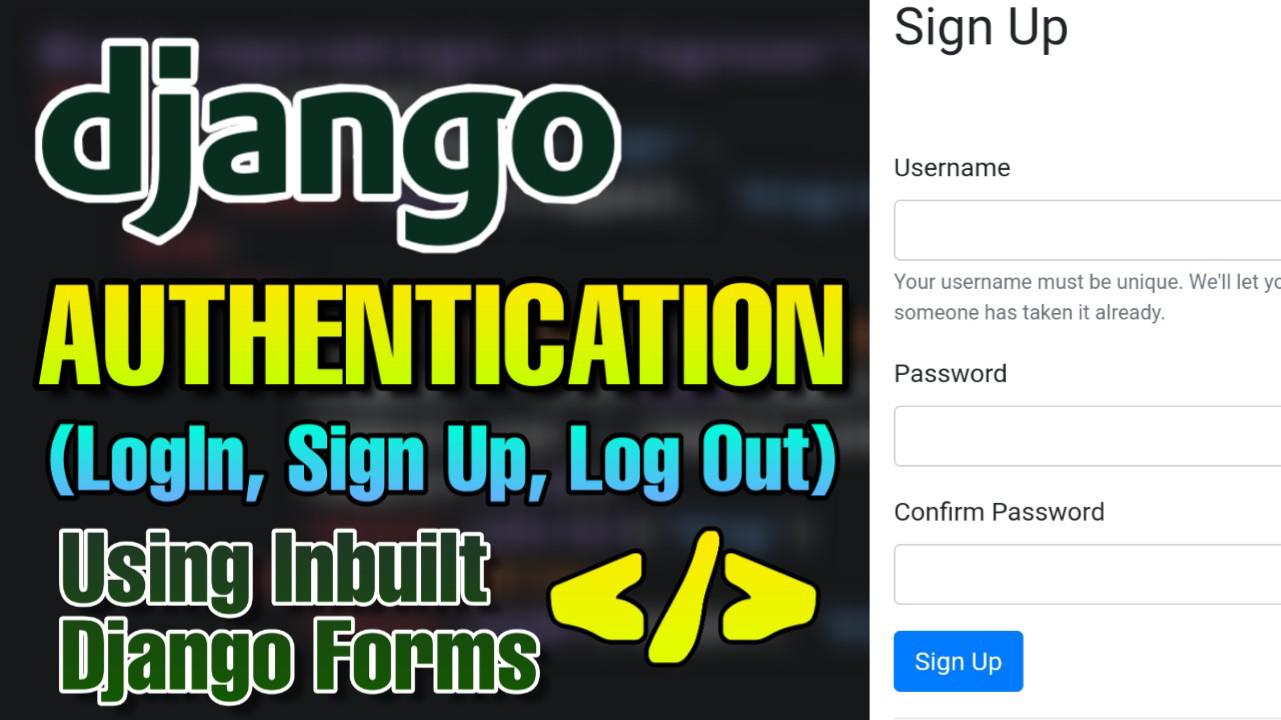
Hey Coders, Today we’re going to build a full authentication functionality in Python Django Framework. Here, We will be use Django built in Forms e.g: UserCreationForm, AuthenticationForm, Etc. In other, we will be use some bootstrap to design our NavBar.
Description:
In this tutorial, We will be design 4 functionality e.g: home, login, signup and logout. Whenever user will be logged in then navbar will be show 2 Button – 1. Home and 2. Logout. In Other hand, If user will be logged out then we will be navbar with 3 Button – 1. Home, 2. Login, 3. SignUp.
So basically, our navbar will be change upon the user authenticated or not. With that said Let’s start our Authentication project. To Build Django Authentication Page Follow given steps.
Django Authentication Page – Login, SignUp:
Let’s first create our django project with the project name “security”. Types Following command to create:
django-admin startproject securityNow It’s time to create an app called “customer” within our project. So, first get inside your project folder then type:
python manage.py startapp customerNow List this “customer” app inside your INSTALLED_APPS of settings.py file, like this:
settings.py
INSTALLED_APPS = [
    '----',
    '----',
    '----',
    'customer',
]
Because we will be using our templates in project root folder, therefore we need to set path of our templates
settings.py
TEMPLATES = [
          {
              -------------------------------,
              'DIRS': [os.path.join(BASE_DIR, 'templates')],
              -------------------,
         }
]
Now create your templates folder inside you project root. Now Inside this folder we will be create our all required Html files.
Before moving forward, run your migrations and migrate by using following command:
python manage.py makemigrationspython manage.py migrateNow It’s time to connect your root urls.py to your customer app urls.py. But before that create a urls.py file inside your customer app folder.
Now open your root urls.py file and add following code:
security/urls.py
from django.contrib import admin
from django.urls import path, include   # Add this one

urlpatterns = [
    path('admin/', admin.site.urls),
    path('', include('customer.urls')),   # add this one
]
Now Open your customer/urls.py and setup url patterns like this:
customer/urls.py
from django.urls import path
from . import views

urlpatterns = [
    # Add Urls
]
In above code, Now whenever we will be add any url then we will add it under urlpatterns here like:
path('pathname/', views.function_name, name="pathname"),Now Let’s create our homepage first.
But before create views and urls, firstly we need to create our “base.html” file. Afterwards, all other html file would be inherit base.html file.
Base.html(Before Modify)
<!DOCTYPE html>
<html lang="en">
<head>
    <meta charset="UTF-8">
    <title>Security</title>
    <link rel="stylesheet" href="https://stackpath.bootstrapcdn.com/bootstrap/4.5.0/css/bootstrap.min.css" integrity="sha384-9aIt2nRpC12Uk9gS9baDl411NQApFmC26EwAOH8WgZl5MYYxFfc+NcPb1dKGj7Sk" crossorigin="anonymous">
</head>
<body>

<!--Navbar-->

<nav class="navbar navbar-expand-lg navbar-dark bg-dark">
  <a class="navbar-brand" href="#">Navbar</a>
  <button class="navbar-toggler" type="button" data-toggle="collapse" data-target="#navbarNav" aria-controls="navbarNav" aria-expanded="false" aria-label="Toggle navigation">
    <span class="navbar-toggler-icon"></span>
  </button>
  <div class="collapse navbar-collapse" id="navbarNav">
    <ul class="navbar-nav">
      <li class="nav-item active">
        <a class="nav-link" href="{% url 'home' %}">Home</a>
      </li>
    </ul>
    <ul class="navbar-nav ml-auto">
      <li class="nav-item">
        <a role="button" class="btn btn-primary" href="{% url 'loginuser' %}">Sign In</a>
      </li>

      <li class="nav-item">
        <a role="button" class="btn btn-warning" href="{% url 'signupuser' %}">Sign Up</a>
      </li>
    </ul>
  </div>
</nav>

{% block content %}

{% endblock %}

</body>
</html>
Now above code is not yet ready for change dynamically on the basis of user authenticated or not. Because we’re not added any conditions yet. We will be implement conditions later on after completing our signup and login form. For then, all other html files will be inherit above base.html file.
Now let’s create “home.html” file and then inherit above base.html file. Because I’ve added Bootstrap 4.5 CDN into above code therefore home.html will be also inherit that bootstrap cdn. We don’t need to define it here separately.
home.html(Before Modify)
{% extends 'base.html' %}

{% block content %}

<div class="container">
    <h1 class="alert alert-danger">USER IS LOGGED OUT</h1>
</div>

{% endblock %}
You can see that above home.html file inherit base.html file by using {% extends ‘base.html’ %}. But still there is something missing that we will be add later on. I’ve not added any condition yet because before declaring any signup and login, then it show error.
Now let’s setup our views.py file of our customer app:
customer/views.py
from django.shortcuts import render, redirect

def home(request):
    return render(request, 'home.html')
In above code, You can see that I’ve created a function called home and imported some function. In this function, I’ve returned a home.html page. Now It’s time to create a path link into the customer/urls.py.
customer/urls.py
from django.urls import path
from . import views

urlpatterns = [
    path('', views.home, name="home"),
]
In this above code, I’ve created a blank path which means whenever someone would visit our website then they will this page at homepage. After then I called my function “home” from views.py and then finally give it to name of “home”. So, that whenever I would like to call it in future then I don’t need to remember their full path.
Now run your server and you will see your homepage now.
But It’s not yet ready because we didn’t yet define any major functions like Signup, Login, Logout and Conditions.
Let’s first create our Sign Up form via using in built Forms of Django 3.
Sign Up Page in Django:
In Django, we have inbuilt forms and modules that makes our tasks so easy. We don’t need to explicitly define each function.
In case of forms, we have two major inbuilt form in Django. First one is “UserCreationForm()” for Signup functionality and second one is “AuthenticationForm()” for Log In functionality. We will also use some inbuilt models like User to create an user and functions.
First, Let’s add and import required modules and packages under “customer/views.py“
customer/views.py
from django.shortcuts import render, redirect
from django.contrib.auth.forms import UserCreationForm, AuthenticationForm  # Add This one
from django.contrib.auth.models import User
from django.contrib.auth import logout, login, authenticate


def home(request):
    return render(request, 'home.html')

# Add this one For Signup
def signupuser(request):
    if request.method == 'GET':
        return render(request, 'signup.html', {'form': UserCreationForm()})
    else:
        if request.POST['password1'] == request.POST['password2']:
            user = User.objects.create_user(username=request.POST['username'],
                                            password=request.POST['password1'])
            user.save()
            login(request, user)
            return redirect('home')
        else:
            return render(request, 'signup.html', {'form': UserCreationForm(), 'error': 'password did not match'})
Now, In this above code I also defined some signupuser function.
signupuser function says that whenever someone will be access our website then he will redirected to our signup.html page, that we will create later on. Here, we will be use dictionary to call UserCreationForm(). By using dictionary we can call this form into signup.html page by using {{form}}.
If someone will process request of POST to register their self by clicking submit button. Then it will first check the condition that both the entered password are same or not. If it’s same then It will create a User with the given user name and password. After then it will save it in database and log In it to the current user. Then It will successfully return it to the homepage.
Else It will return same page with some error e.g password did not match.
Now add path of sign up into urlpatterns of “customer/urls.py”:
customer/urls.py
path('signup/', views.signupuser, name="signupuser"),Add above code right after home path into your urls.py. Now create a signup.html file that we will return to user whenever someone would access our signup url.
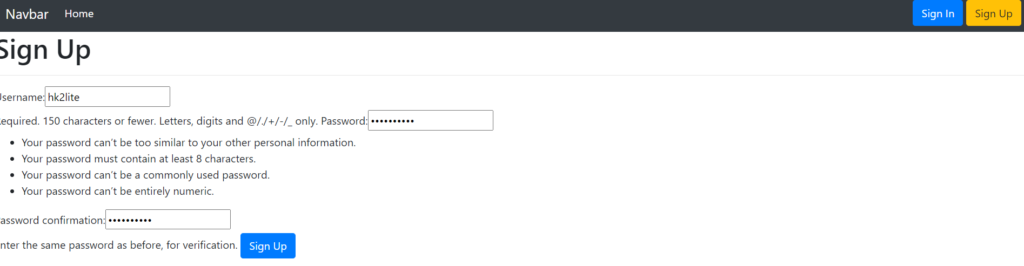
signup.html
{% extends 'base.html' %}

{% block content %}

<h1>Sign Up</h1>
<hr>

<form method="post">
    {% csrf_token %}
    <strong>{{error}}</strong><br>
    {{form}}
    <button type="submit" class="btn btn-primary">Sign Up</button>
</form>
{% endblock %}
In this above code, you can see that I’ve created a form with post method. Here, you could see that I used {{form}} to access UserCreationForm() and {{error}} to call error.
Modifications – Home, Base HTML
Now along with that lets modify our home.html and base.html. In these files we will add some condition that will check conditions and then they will change their content according to that condition.
Here, we will check that If an user is authenticated then It will show other navbar and else it will show other navbar.
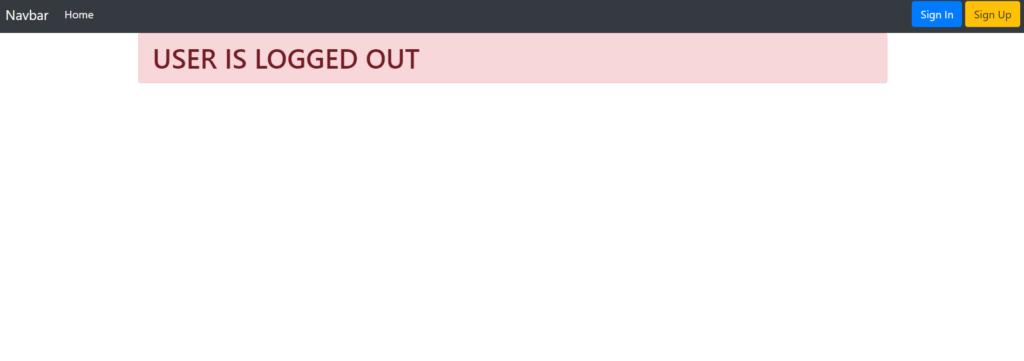
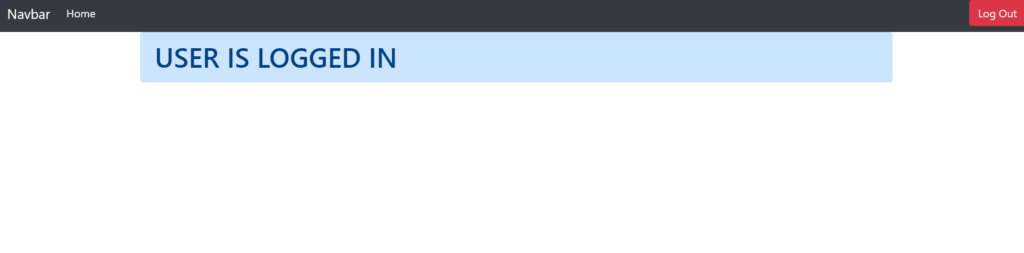
In home.html, If the use will be authenticated then it will show the message e.g “User is Logged In ” and else It will show message e.g “User is logged out”.
Home.html(Modified)
{% extends 'base.html' %}

{% block content %}

<!--IF user is logged in-->
{% if user.is_authenticated %}

<div class="container">
    <h1 class="alert alert-primary">USER IS LOGGED IN</h1>
</div>

{% else %}

<div class="container">
    <h1 class="alert alert-danger">USER IS LOGGED OUT</h1>
</div>

{% endif %}

{% endblock %}
In above code, You could see that we’ve implemented a If-Else conditions e.g: {% if user.is_authenticated %} show content 1 {% else %} Show content 2 {% endif %}.
Similarly, we will add same If-else condition in base.html too.
Base.html(Modified)
<!DOCTYPE html>
<html lang="en">
<head>
    <meta charset="UTF-8">
    <title>Security</title>
    <link rel="stylesheet" href="https://stackpath.bootstrapcdn.com/bootstrap/4.5.0/css/bootstrap.min.css" integrity="sha384-9aIt2nRpC12Uk9gS9baDl411NQApFmC26EwAOH8WgZl5MYYxFfc+NcPb1dKGj7Sk" crossorigin="anonymous">
</head>
<body>

<!--Navbar-->

{% if user.is_authenticated %}

<nav class="navbar navbar-expand-lg navbar-dark bg-dark">
  <a class="navbar-brand" href="#">Navbar</a>
  <button class="navbar-toggler" type="button" data-toggle="collapse" data-target="#navbarNav" aria-controls="navbarNav" aria-expanded="false" aria-label="Toggle navigation">
    <span class="navbar-toggler-icon"></span>
  </button>
  <div class="collapse navbar-collapse" id="navbarNav">
    <ul class="navbar-nav">
      <li class="nav-item active">
        <a class="nav-link" href="{% url 'home' %}">Home</a>
      </li>
    </ul>
    <ul class="navbar-nav ml-auto">
      <form action="{% url 'logoutuser' %}" method="POST">
        {% csrf_token %}
        <button type="submit" class="btn btn-danger">Log Out</button>
      </form>
    </ul>
  </div>
</nav>

{% else %}

<nav class="navbar navbar-expand-lg navbar-dark bg-dark">
  <a class="navbar-brand" href="#">Navbar</a>
  <button class="navbar-toggler" type="button" data-toggle="collapse" data-target="#navbarNav" aria-controls="navbarNav" aria-expanded="false" aria-label="Toggle navigation">
    <span class="navbar-toggler-icon"></span>
  </button>
  <div class="collapse navbar-collapse" id="navbarNav">
    <ul class="navbar-nav">
      <li class="nav-item active">
        <a class="nav-link" href="{% url 'home' %}">Home</a>
      </li>
    </ul>
    <ul class="navbar-nav ml-auto">
      <li class="nav-item">
        <a role="button" class="btn btn-primary" href="{% url 'loginuser' %}">Sign In</a>
      </li>

      <li class="nav-item">
        <a role="button" class="btn btn-warning" href="{% url 'signupuser' %}">Sign Up</a>
      </li>
    </ul>
  </div>
</nav>


{% block content %}

{% endblock %}

</body>
</html>
Now In above code, You can see that If user.is_authenticated then it will return navbar(home, logout) and else It would return navbar(home, signup, login).
Sign In Django Authentication Page:
Now Let’s create our Sign In page in Django. As I told you In Django, we have AuthenticationForm() and authenticate functions to verify and authenticate user. So, that we could logged them into the server without allowing any unauthorized access.
Let’s first create our function in “customer/views.py” and add following code right after signupuser function.
customer/views.py:
def loginuser(request):
    if request.method == 'GET':
        return render(request, 'login.html', {'form': AuthenticationForm()})
    else:
        user = authenticate(request, username=request.POST['username'], password=request.POST['password'])
        if user is None:
            return render(request, 'login.html',
                          {'form': AuthenticationForm(), 'error': 'Password Or Username incorrect'})
        else:
            login(request, user)
            return redirect('home')
In above code, You could see that If we would get server request from user then we will return a login.html file. In which, we will able to access AuthenticationForm() using our defined dictionary key e.g {‘form’: AuthenticationForm()}.
Else If the user request a post then first we will be authenticate user identity with given username and password. If the user would not exist in our database then we will simply return a error else we will be logged them into the server and redirect them to homepage.
Now let’s create our login.html, I’ve created a following login.html file that you could copy and paste.
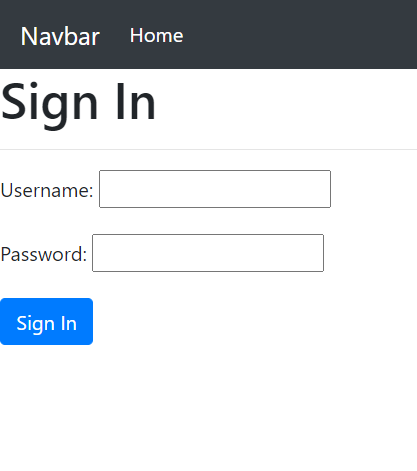
login.html
{% extends 'base.html' %}

{% block content %}

<h1>Sign In</h1>
<hr>

<form method="post">
    {% csrf_token %}
    <strong>{{error}}</strong><br>
    {{form.as_p}}
    <button type="submit" class="btn btn-primary">Sign In</button>
</form>
{% endblock %}
Now, Let’s setup our url path for Login page. You need to add following code right after signup path
customer/urls.py
path('login/', views.loginuser, name="loginuser"),Log Out Django Page:
It’s our final task, In which we will create a logout functionality. Here, we need to define a function for logout and then need to map url for logout. Here, we don’t need to create any logout html page separately.
Let’s first define our logoutuser function in views.py. Add following code right after that loginuser function
customer/views.py
def logoutuser(request):
    if request.method == 'POST':
        logout(request)
        return redirect('home')
Here, we will have only post method. Because we want whenever someone would click on Sign Out button only then It should have process a functionality.
Now We need to add logout url in customer/urls.py. we will be add following code right after that login url.
customer/urls.py
path('logout/', views.logoutuser, name="logoutuser"),Now, we’ve already added a signout function in base.html that you could see. So, we don’t need it to define it again.
code for logout in base.html
<form action="{% url 'logoutuser' %}" method="POST">
    {% csrf_token %}
    <button type="submit" class="btn btn-danger">Log Out</button>
</form>
Now It’s all done, let’s see how it would be look like too see each and every pages. But before that run your server via using “python manage.py runserver”.
1. Homepage And Without Login:
3. Sign Up Page
4. Login Page
Now these are the above front-end that you will be going see whenever you run your server. So, Let’s end this tutorial. If you would still face any problem then you can just see all those code in give github repositiry:
GitHub Repository:
GitHub LinkOr
In Shell type “git clone https://github.com/hk2lite/security.git”
You Can Also customize your form and bootstrap with Django-Crispy-Forms Module. Click the link given below to see how to use it:
Link: How To Add Bootstrap4 in Django With crispy-forms
So, I hope you all would like this article. If yes then please don’t forget to share this everywhere you could. You could also subscribe our blog via email to get notified with future posts.
&media=https://www.codechit.com/wp-content/uploads/2020/06/PicsArt_06-04-07.10.54_7400-1024x576.jpg)
Thank’s To Visit…
Intelligent
Nice post. I was checking continuously this weblog and I’m inspired! Very useful information specifically the remaining section 🙂 I handle such information much. I was looking for this particular information for a long time. Thanks and best of luck. |