

Hi coders, In this article, I’m going to explain you how you can setup Vue Router in Vuejs 3 version. I’ll explain step by step process from installation to usage of routers.
Vue Router in VueJS 3.0:
Let me first explain you that what is Router and why one should use it in their application.
Note: Before moving forward, I’m assuming that If you’re reading this router tutorial then you must have knowledge of components in Vue, e.g How to creates component and all that.
What is Vue Router:
We all know that Vue JS is framework, that used to develop SPAs(Single Page Applications). VueJS is highly reactive and It interacts with their components. And When you switch between component or change It’s component then It will not refresh.
In such cases, you can use Vue Router to create routes(url). After that whenever you will change routes(Url), then it will not refresh the page, instead, It will only change that component.
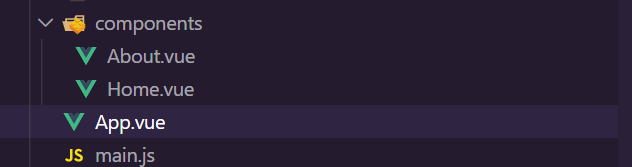
Before starting this guide, First create two components in Vuejs. We will switch between these two components with help of routes.
How to Install And Setup Vue Router:
Now let’s start our guide with installing the router in Vuejs 3 and then How to setup it.
To Install Vue-Router for VueJS 3.0, You have to type the following command If you are reading this at the time of writing this article(Jan 2019). Because It’s still not fully released.
npm install vue-router@next --saveYou can also checkout installation command from it’s official website
Once you have installed it. Now you can move to the next step which is setting up our Router.
Here, I’ve created two components Home and About. We will set route path with these components.
How to create and setup Routes:
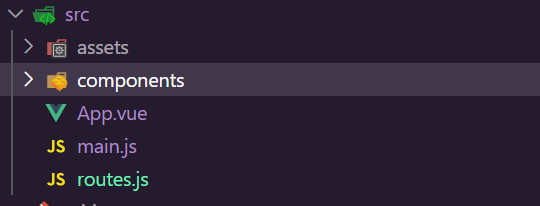
Now first create routes.js file inside “src” folder and open it.
Now add the following code inside your routes.js file.
import { createWebHistory, createRouter } from 'vue-router';
import Home from './components/Home.vue';
import About from './components/About.vue';

const routes = [
    {
        path: "/home",
        name: "home",
        component: Home
    },
    {
        path: "/about",
        name: "about",
        component: About
    },
]

const router = createRouter({
    history: createWebHistory(),
    routes
})

export default router;
In the above code, first of all, You need to import createWebHistory and createRouter function from ‘vue-router’. And after that, we imported our Home and About components.
Then we declared routes variable that contains an array of objects. where each object contains information about a particular route.
Our path object contains three thing:
- path: It’s a url path.
- name: name of your route. It’s optional but highly recommended.
- component: a component name that you want to render on this specific path.
So, the same we did in our code. I declared Home component on /home path. And About component at /about path. Well, name argument is optional, but its highly recommended(I will explain it later).
Now we will define our router variable and here we will create createRouter({}) object. This createRouter() function takes an object, Inside this object you need to pass history: createWebHistory(), and then your routes variable.
Now, Just export your router variable. So, that later we could import it inside our main.js file.
How to use our routes:
Now it’s times to use our routes, but before that we have import this routes.js inside our main.js file.
import { createApp } from 'vue'
import App from './App.vue'
import router from './routes'

const app = createApp(App)
app.use(router)
app.mount('#app')
Inside main.js file, we imported our router from routes.js, and then you have to pass this router as an argument inside use() method, e.g app.use(router).
Now our routes are ready to use.
Using our Routes:
Now let’s use these route inside our VueJS app. To use these routes, First of all you have to define where your want to render your components with these routes.
<router-view>: we use router-view to define where to render component. and <router-link> as navigation to navigate through different routes.
Inside App.vue
<template>
  <div>
    <router-link to="/home">Home</router-link>
    <router-link to="/about">About</router-link>

    <!-- Router View -->
    <router-view></router-view>
  </div>
</template>
We successfully set up and used our routes.
Using Routes with their Name:
So, far we used absolute path /home or /about to define our routes.
<router-link to="/home">Home</router-link>In this case, If you change path(url) of your /home to /homepage. Then you have to change your path everywhere in router-link separately. Where you’ve declared your absolute path. It’s not a good way to do it.
Remember we’ve given name to each routes at the time of declaring our routes. Here, you can use these name to declare your router-link, instead of using absolute path.
<router-link :to="{ name:'home' }">Home</router-link>We have to first bind our :to property, so that you can use expression inside it. Then you need to define an object containing name of the route that you define.
Now, even if you change it’s route path /home to /homepage. then you don’t have to update it everywhere. Because we’ve rendered it using name that will be the same forever.
Read Also: VueJS 3 Beginners Guide 2021
So, I hope you all liked this article. If yes then please don’t forget to share this article with your friends. You can also subscribe our blog via email to get future notifications from this blog.
Thanks to read…