Hey coders, today I’m going to show you how you can download, setup, and configure your PostgreSQL database. Later on, I’ll also show you how to connect your Postgresql database with the Django web framework. If you want to know the full process then please read full article till the end.
Connect PostgreSQL with the Django web framework:
PostgreSQL is a kind of relational database, and It’s one of the most powerful database. Even lots of big enterprises and companies use this database for their large scale projects. Now Let’s start our process to connect PostgreSQL with Django.
1. Download PostgreSQL and pgAdmin:
The first and foremost thing is that you have to download the Postgresql database and pgAdmin to manage this database. Download PostgreSQL database and pgAdmin from their official website(Link is given):
After downloading, It’s time for installation process, So, let’s begin with PostgreSQL database installation.
PostgreSQL Installation:
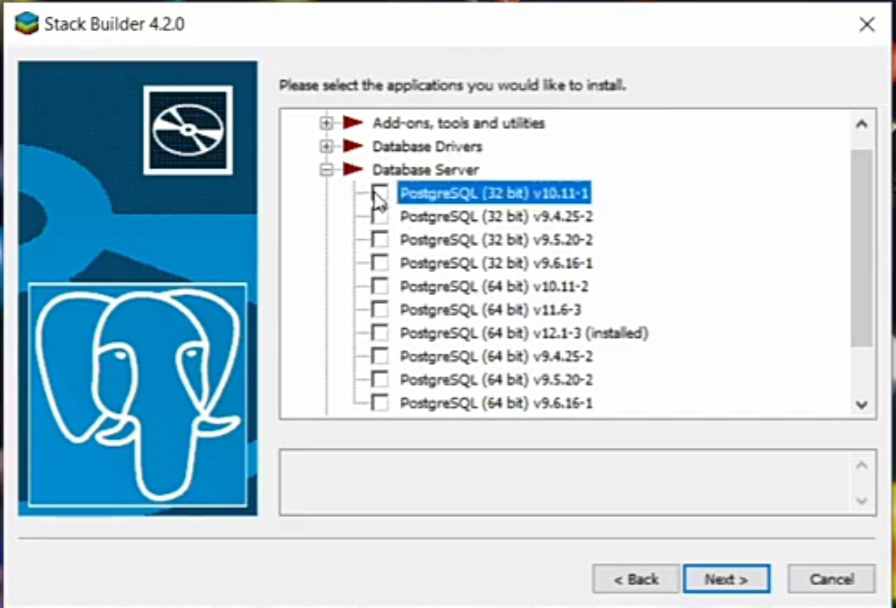
Now click on the setup file of PostgreSQL and then follow the all instructions of installation. When you will set a password during installation then keep that password in your mind. Because that password we will be use to login into our pgAdmin. In the end of installation, you will be see an option that “Please select the application that you would like to install“, Here you have to select an 1st option underneath of Data Server.

Done…
pgAdmin Installation:
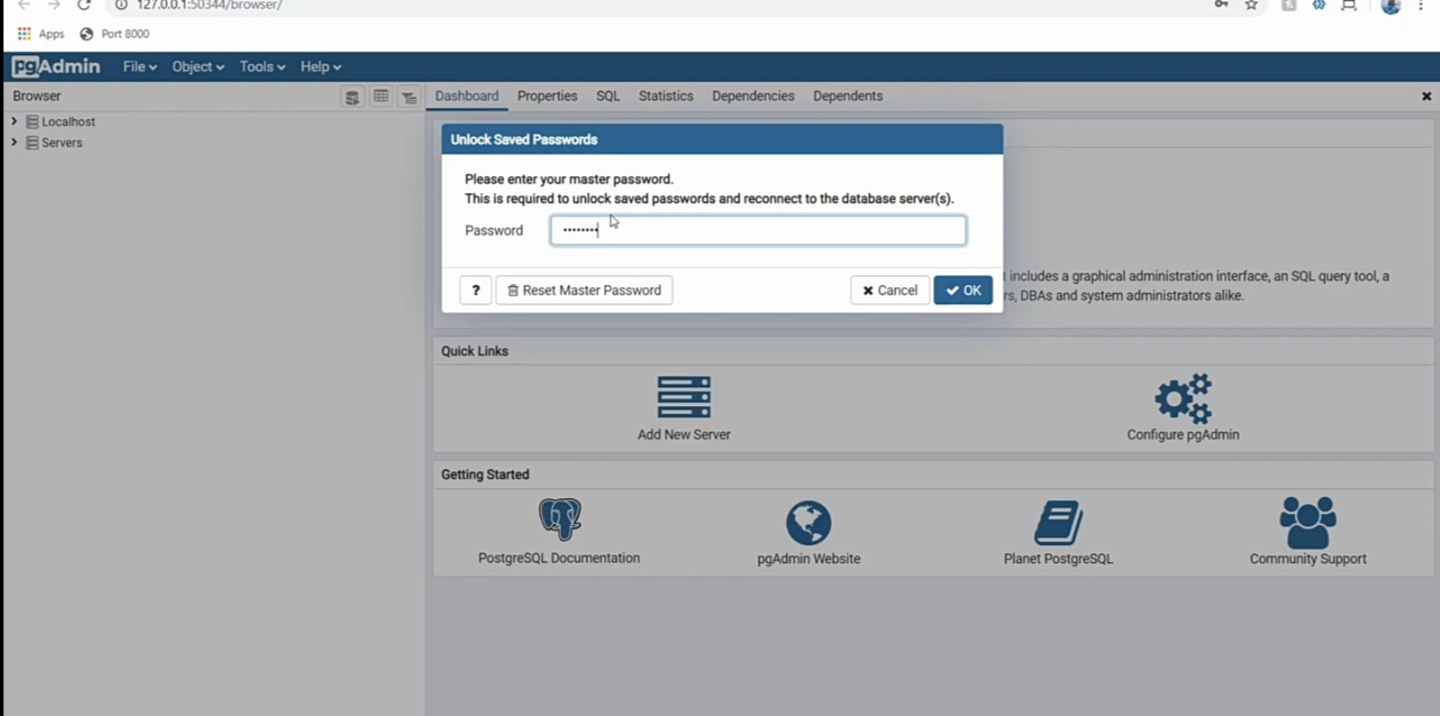
Now It’s time to install our interface that we’re gonna use to manage our PostgreSQL DB. Click on the setup of pgAdmin and then follow all the instructions of installation. Once it’s done then click on the launch button, then it will open your web browser to open admin panel. Now your admin panel is active on your local server.

Enter the password(password that you had entered at the time of installation) and you will be logged in into your database
2. Setting Up Database
Once you entered into your pgAdmin account then you have to create a database, So, that we can use it in our django web application. To do that you have to follow all the steps given below.
- Firstly, you have to create “server group“: To create (Local server > Create > Server Group). and give it name “DEMO” then save it.
- Now within this DEMO Server group, create a “server“: To Create (DEMO > Create > Server) and give it a name “DEMO SERVER”.
- On the top, you will see “connection” tab. click on it and fill the info – Host: “localhost” and Password: “Main Password” and save it.
- Now you’ve to create a seperate database inside this server. To create new database (DEMO > DEMO SERVER > Database > Create > Database). Now give it a name to your database “DEMO_TEST“.
- Now you have to install a python package called psycopg2 by using cmd: “pip install psycopg2” – It’s a kind of adapter that helps postgres to communicate with python lang.
That’s it, now It’s time to configure settings.py of our Django app to connect our DEMO_TEST postgresql db with our web app.
Connecting Django App With PostgresSQL Database
Now open your settings.py file and then configured your DATABASES SECTION like this:
DATABASES = {
     'default': {
         'ENGINE': 'django.db.backends.postgresql',
         'NAME': 'DEMO_TEST'   # Name of database that we created
         'USER': 'postgres',  # Username of your database
         'PASSWORD': 'EXAMPLEPASS', # Replace it with your main password
         'HOST': 'localhost'
         'PORT': '5432'
      }
}
You can find all above information inside connection tab of your server properties. Now It’s all done…
Final step remain, which is making migration. So, just migrate your database by using command:
python manage.py makemgirations
python manage.py migrate
Now go back to your database and you will see all the required tables are now available.
Read Also: Django REST Framework full guide for beginners
So, I hope you all find this article useful and now you can easily connect postgreSQL Database with Django web application. So, please don’t forget share this article with your friends and groups.
Thank’s to visit…


2 thoughts on “Connect PostgreSQL Database With Django 3.0(Full Setup)”